
Why Do I Need Docker, and How Do I Use It?

Docker is a program that allows the operating system to run processes in an isolated environment based on specially created images. And, while the technologies underlying Docker existed earlier, it was Docker that changed the way we now build project infrastructure, assemble and launch services.
(Some details were purposefully left out of the article to avoid unnecessary information).
- Installation
- Launch
- What's all this for?
- Application in a container
- Working with images
- Container management
- Interaction between the components of a system
- Preparing your own docker image
- Docker Compose
- In action
- Docker: what’s under the hood?
Installation
To start with Docker, you must first install the Docker Engine. Download links for all popular platforms are provided at https://docs.docker.com/engine/install/. Select yours and install Docker.
There's one thing to remember when installing Docker on Mac and Linux. By default, Docker runs through a non-networked UNIX socket. For security reasons, the socket is blocked for users who are not members of the docker group. Although the installer automatically adds the current user to this group, Docker will not work straight away. In reality, changing the group by the user has no effect till the user logs in again. This is a feature of the core. Enter the id command to see which groups your user belongs to.
You can check if the installation was successful with the docker info command:
$ docker info
Containers: 22
 Running: 2
 Paused: 0
 Stopped: 20
Images: 72
Server Version: 17.12.0-ce
Storage Driver: overlay2
 Backing Filesystem: extfs
 Supports d_type: true
 Native Overlay Diff: true
Logging Driver: json-file
Cgroup Driver: cgroupfs
...
It provides quite a lot of information about Docker configurations as well as work statistics.
Launch
At this stage, the execution commands are given with no explanation. Later, more information on how they're formed and what include will be given.
Let's start with the easiest one:
$ docker run -it nginx bash
root@a6c26812d23b:/#
This command will begin downloading the nginx image on the initial call, so you will have to wait a few moments. After the image is downloaded, bash will run, and you will find yourself in a container.
Go through the file system, and look at the /etc/nginx. As you can see, its content does not match what you have on your system. This file system was generated by the nginx image. Everything you do within it will not affect your main file system. With the exit command, you can get back to your native system.
Now, let's call the cat command, which is already in another container but is also launched from the nginx image:
$ docker run nginx cat /etc/nginx/nginx.conf

user  nginx;
worker_processes  1;

error_log  /var/log/nginx/error.log warn;
pid        /var/run/nginx.pid;
...
$
The command is executed almost instantly since the image has already been uploaded. Unlike before, when a bash script and an interactive session were launched in the container, the cat /etc/nginx/nginx.conf command for the nginx image will display the contents of the specified file (taken from the running container's file system) and return control to where you were before. You won’t end up inside the container.
The last launch option will be:
# Note that no command is specified after the image name
# This approach works if the launch command is written in the image
$ docker run -p 8080:80 nginx
This command does not restore control, because Nginx starts running. Enter localhost:8080 into your browser. You'll see that the Welcome to nginx! page has loaded!. If you return to the terminal where the container was launched, you'll see a log of requests to localhost:8080. You may stop nginx by pressing Ctrl + C.
Although each launch was different and resulted in various outcomes, the overall pattern of their work is consistent. Docker downloads the image automatically (the first argument after docker run) and, if necessary, runs the container with the specified command.
An image is an independent file system. For now, we use ready-made images, but we will eventually learn how to create them ourselves.
A container is a running process of the operating system in an isolated environment with an image file system.
A container is, once again, just a usual operating system process. The main difference is that Docker starts the process in an isolated environment due to the kernel’s capabilities (details in the end). The container sees its own process list, network, file system, and so forth. Unless otherwise specified, it cannot interact with your main operating system or anything stored or launched there.
Try running the docker run -it ubuntu bash command and typing ps auxf inside the running container. The output will be as follows:
USER       PID %CPU %MEM    VSZ   RSS TTY      STAT START   TIME COMMAND
root         1  0.1  0.1  18240  3300 pts/0    Ss   15:39   0:00 /bin/bash
root        12  0.0  0.1  34424  2808 pts/0    R+   15:40   0:00 ps aux
There are only two processes, and the process ID of Bash is 1. To ensure that the /home directory is empty, you may use the ls /home command. Also, check out that the root user is the default one inside the container.
What's all this for?
Docker is a general-purpose tool for delivering applications to machines (local computers or remote servers) and running them in an isolated environment.
Remember the process when you had to build programs from the source. It’s likely to consist of the following steps:
- Install all of the operating system dependencies (finding them is quite a task)
- Download the archive, unpack it
- Start configuration
make configure - Start compilation
make compile - Install
make install
As you can see, the process is not always straightforward or quick, and in certain cases, it may even be impossible because of cryptic issues (not to mention the corruption of the operating system).
Docker simplifies this method by allowing you to run a single command with a near-perfect success rate. Look at a fictional example in which the Tunnel program is installed on a local computer in the /usr/local/bin directory. It uses the tunnel image:
docker run -v /usr/local/bin:/out tunnel
This command moves the program's executable file from the tunnel image in the /usr/local/bin directory on the main system. The docker run command launches a container from the tunnel image. The program is compiled locally and eventually ends up in the /usr/local/bin directory of the main file system. You may now run the program by typing tunnel in the terminal.
What if the program we are installing has dependencies? The secret is that the container was launched from a fully equipped image. It includes all necessary dependencies and ensures approximately 100% operability regardless of the status of the main OS.
It is not always necessary to copy a program from a container to your main system. It is enough to launch the container only when you need it. Assume we decided to create a static website using Jekyll. Jekyll is a popular static website generator written in Ruby, and even this guide is generated using it and Docker as well.
Earlier you have had to install at least Ruby and Jekyll itself as a gem on your main system (gem is the name of packages in Ruby). Furthermore, as with all such things, Jekyll only works with particular versions of Ruby, which leads to its own configuration issues.
Running Jekyll with Docker is reduced to just a single command executed in the blog directory (you can examine our guides repository):
docker run --rm --volume="$PWD:/srv/jekyll" -it jekyll/jekyll jekyll server
In the same way, a huge number of different software products are being launched at the moment. The further away, the more this approach takes over the world. Now, we dip into the origin of the name Docker.
![]()
As you know, ships are the leading way to distribute goods around the world. Previously, the cost of transportation was high, because each cargo had its own shape and type of material.
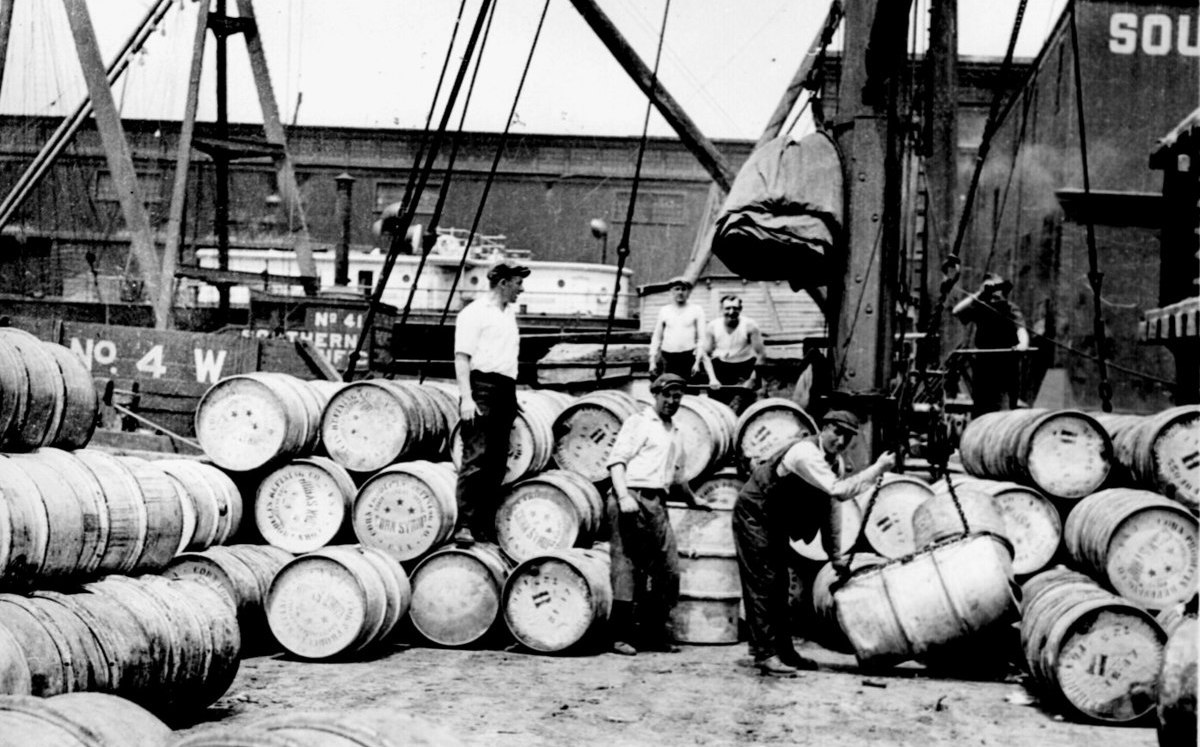
Loading a bag of fish or a car onto a ship are different tasks requiring different processes and tools. There were problems with loading methods that required a variety of cranes and tools. And, given the ship's fragility, securely loading cargo on board was a challenging procedure.
But at some point, everything changed. The following picture says more than a thousand words:
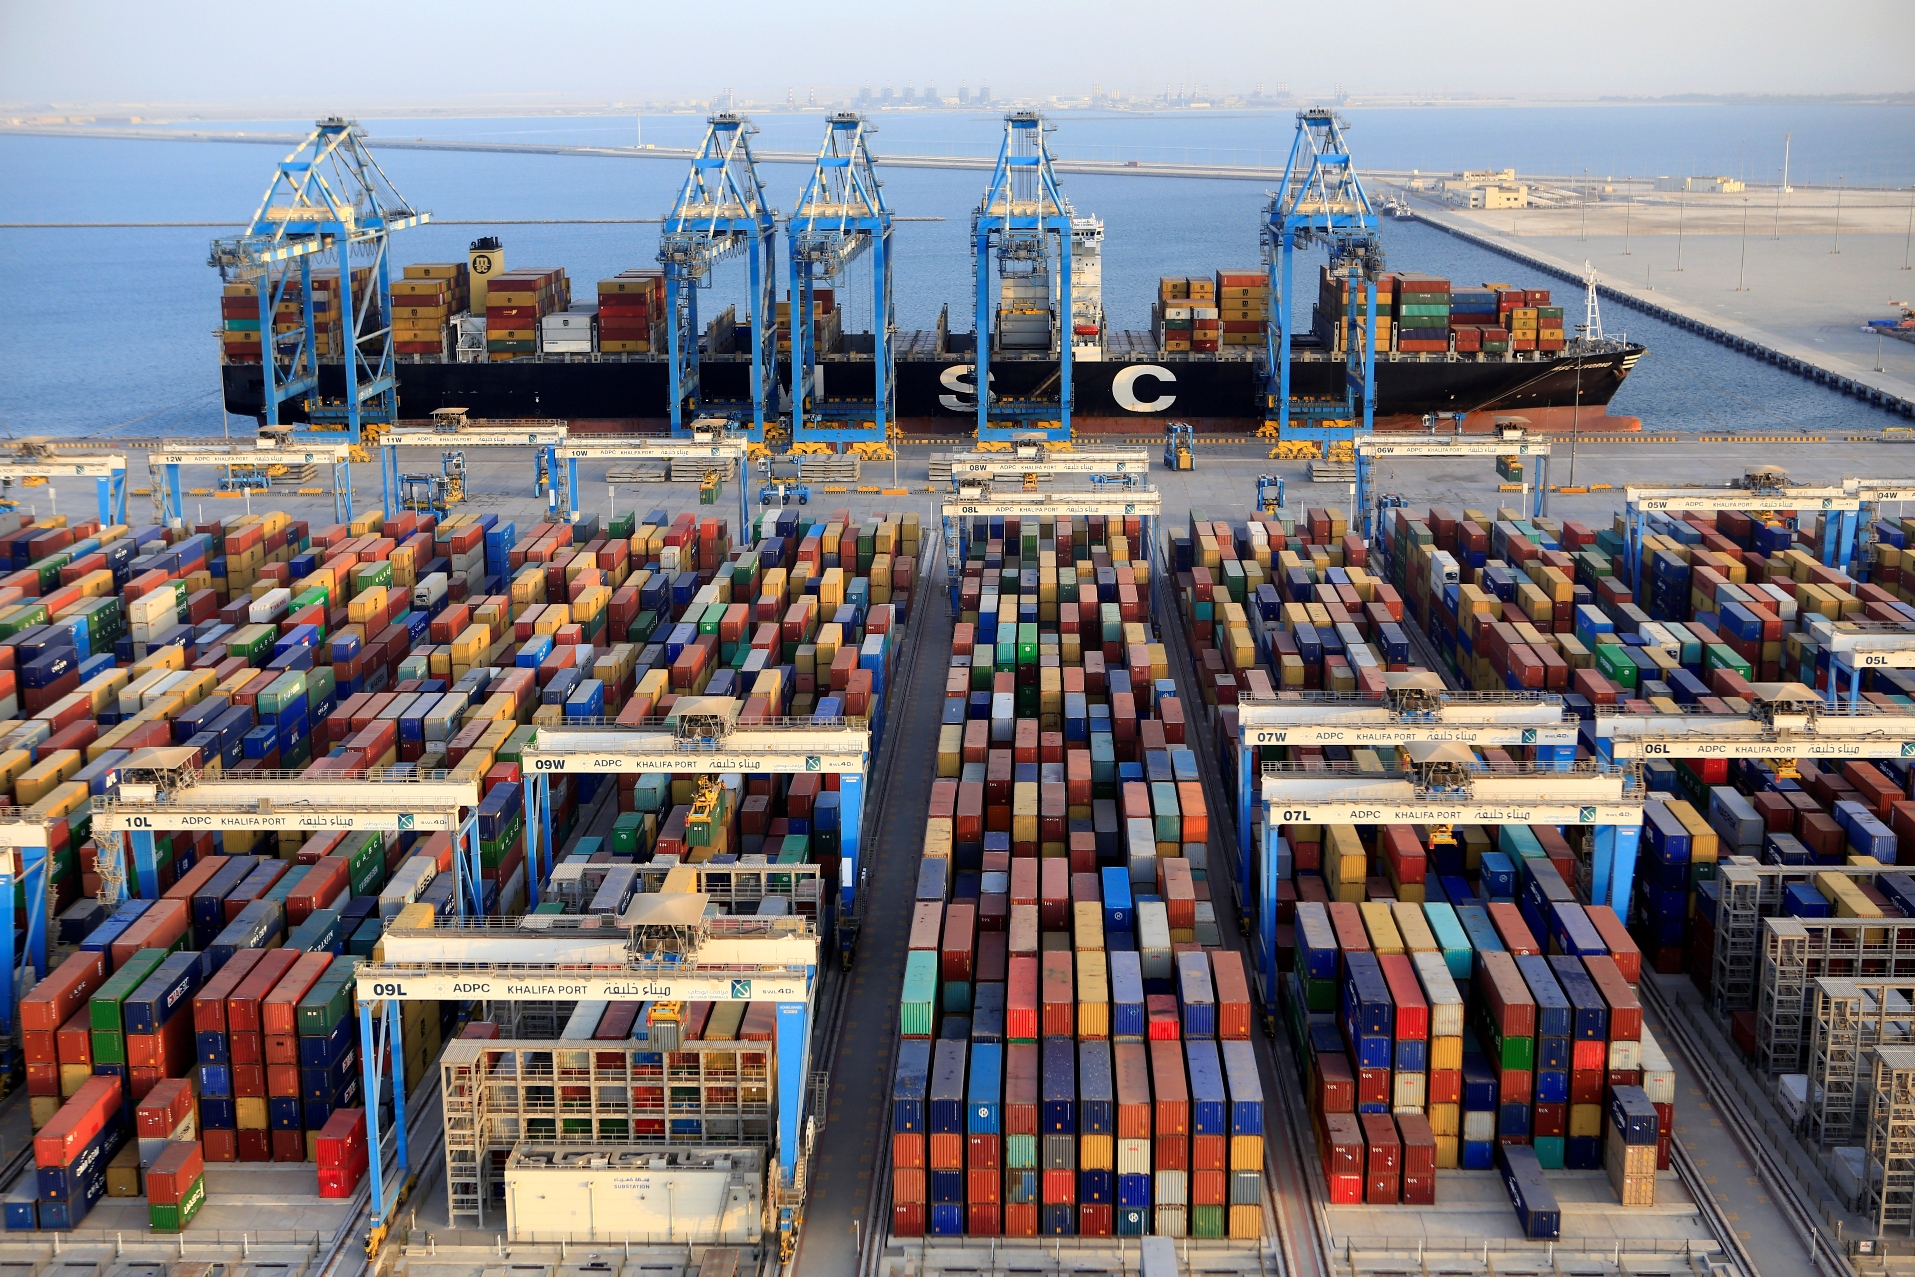
Containers have equalized all types of cargo and standardized loading and unloading tools around the world, which in turn led to a simplification of processes, acceleration, and, therefore, lower costs.
The same thing happened in software development. Docker has become a universal software delivery tool, regardless of its structure, dependencies, or installation method. All that is required for programs distributed via Docker is that they are contained within the image and do not interact with the main system or other containers. The importance of this fact cannot be overestimated. Now, updating software versions does not involve either the system itself or other programs. Nothing can break anymore. All you need to do is download a new image of the program you want to update. In other words, Docker removed the dependency hell problem and made the infrastructure immutable.
Given the existence of numerous configuration tools (chef, puppet, ansible) prior to the Docker era, server management was somewhat daunting. The main cause of all problems was the mutable state. Programs are installed, updated, and deleted. This happens at different times and in somewhat different ways on different servers. Updating the version of a language like PHP, Ruby, or Python, for example, could be quite an adventure with a total loss of workability. It's much easier to put a new server next to it and switch to it. In theory, Docker allows you to make such a switch. Because each running container exists in its own environment, it is best to forget about the old one and replace it with a new one. Moreover, the rollback in such a system is pretty superficial: all you need is to stop the new container and rebuild the old one using the previous image.
Application in a container
Let’s now discuss how an application corresponds to a container. There are two possible approaches:
- The entire application is a container, inside which a process tree unfolds: an application, a web server, a database, and so on
- Every running container is an atomic service. In other words, each container, whether a web server or an application, is a single program
In fact, only the second approach provides access to all of Docker's advantages. Firstly, services are usually split over numerous servers and moved between them (for example, when a server crashes). Secondly, updating one service shouldn't lead to stopping the others.
The first approach is extremely rare, yet sometimes required. Hexlet, for example, works in two modes. The website and its services follow the second model, in which each service is distinct, but for practical exercises performed in a browser, we follow the principle of "one user — one container.” Depending on the exercise, anything can be placed inside the container. At least, the Hexlet IDE itself always starts there, and it in turn generates terminals (processes). A database is launched in the same container in our database course, and a web server is launched in a web-related course. This method creates the illusion of working on a genuine machine and makes it simpler to maintain work with exercises. Just to be clear, you probably won't require our use case, which is highly unique.
Another important aspect when working with containers relates to the state. For example, if the database is launched in a container, then its data should never be stored within the container. A container can be easily destroyed because it is an operating system process, and its existence is never permanent. Docker includes tools for storing and accessing data from the main file system. We'll get to them later.
Working with images
Docker is more than just a program. This is an entire ecosystem with many projects and services. The main service you will have to work with is Registry, an image storage.
Generally, it works the same way as the package repository of any package manager. You can view its contents on the website https://hub.docker.com/, by clicking Explore.
When we run the run docker run <image name> command, Docker checks for the presence of the specified image on the local machine and downloads it if necessary. The list of images already downloaded to your computer can be displayed with the docker images command:
$ docker images
REPOSITORY                           TAG                 IMAGE ID            CREATED             SIZE
workshopdevops_web                   latest              cfd7771b4b3a        2 days ago          817MB
hexletbasics_app                     latest              8e34a5f631ea        2 days ago          1.3GB
mokevnin/rails                       latest              96487c602a9b        2 days ago          743MB
ubuntu                               latest              2a4cca5ac898        3 days ago          111MB
Ruby                                 2.4                 713da53688a6        3 weeks ago         687MB
Ruby                                 2.5                 4c7885e3f2bb        3 weeks ago         881MB
nginx                                latest              3f8a4339aadd        3 weeks ago         108MB
elixir                               latest              93617745963c        4 weeks ago         889MB
postgres                             latest              ec61d13c8566        5 weeks ago         287MB
Let's figure out how the image name is formed, and what it includes.
The second column in the output above is called TAG. The docker run nginx command is, in fact, a shortcut for the docker run nginx:latest which was executed. That is, we do not just download the nginx image, but its particular version. The latest is the default tag. It's easy to guess that it means the latest version of the image.
It is essential to understand that this is just an agreement, not a rule. A specific image may or may not have the latest tag, but it will not contain the most recent changes just because no one publishes them. ВPopular images, on the other hand, follow the agreement. As it is clear from the context, tags in Docker are changeable; that is, no one guarantees that downloading an image with the same tag on different computers at different times will result in the same thing. This approach may seem strange and unreliable because there are no guarantees, but in practice, there are certain agreements that all popular images follow. The latest tag always contains the most recent version and is constantly updated, but semantic versioning is also actively used. Let’s have a look at https://hub.docker.com/_/nginx
1.13.8, mainline, 1, 1.13, latest 1.13.8-perl, mainline-perl, 1-perl, 1.13-perl, perl 1.13.8-alpine, mainline-alpine, 1-alpine, 1.13-alpine, alpine 1.13.8-alpine-perl, mainline-alpine-perl, 1-alpine-perl, 1.13-alpine-perl, alpine-perl 1.12.2, stable, 1.12 1.12.2-perl, stable-perl, 1.12-perl 1.12.2-alpine, stable-alpine, 1.12-alpine 1.12.2-alpine-perl, stable-alpine-perl, 1.12-alpine-perl
Tags with the complete semantic version (x.x.x) are always immutable, even if they contain something else, such as 1.12.2-alphine. This version is safe to use in the production environment. When the path version changes, tags such as 1.12 are updated. That is, there may be version 1.12.2 inside the image, followed by 1.12.8 in the future. The same applies to versions that merely specify the major version, for example, 1. Only in this case, the update is not only on the patch but also on the minor version.
As you may recall, the docker run command downloads the image if it is not available locally, but this check has nothing to do with updating the content. In short, if the nginx:latest has been updated, docker run will not download it; instead, it will use the latest, that is already downloaded. Another command for guaranteed image updates is docker pull. It always checks whether the image has been updated for a certain tag.
Along with tags, the image name can include a prefix, such as etsy/chef. This prefix is the service account name that is used to create images for the Registry. The majority of the images have a prefix, but there’s still a small set, literally a hundred images, with no prefix at all. These images are special since they are supported by Docker itself. Therefore, if there is no prefix in the image name, this is an official image. You can check their list: https://github.com/docker-library/official-images/tree/master/library
Images can be deleted with the docker rmi <imagename> command.
$ docker rmi Ruby:2.4
Untagged: Ruby:2.4
Untagged: Ruby@sha256:d973c59b89f3c5c9bb330e3350ef8c529753ba9004dcd1bfbcaa4e9c0acb0c82
If Docker has at least one container from the removed image, then it will not allow to delete it for obvious reasons. If you still want to delete both the image and all containers associated with it, use the -f flag.
Container management
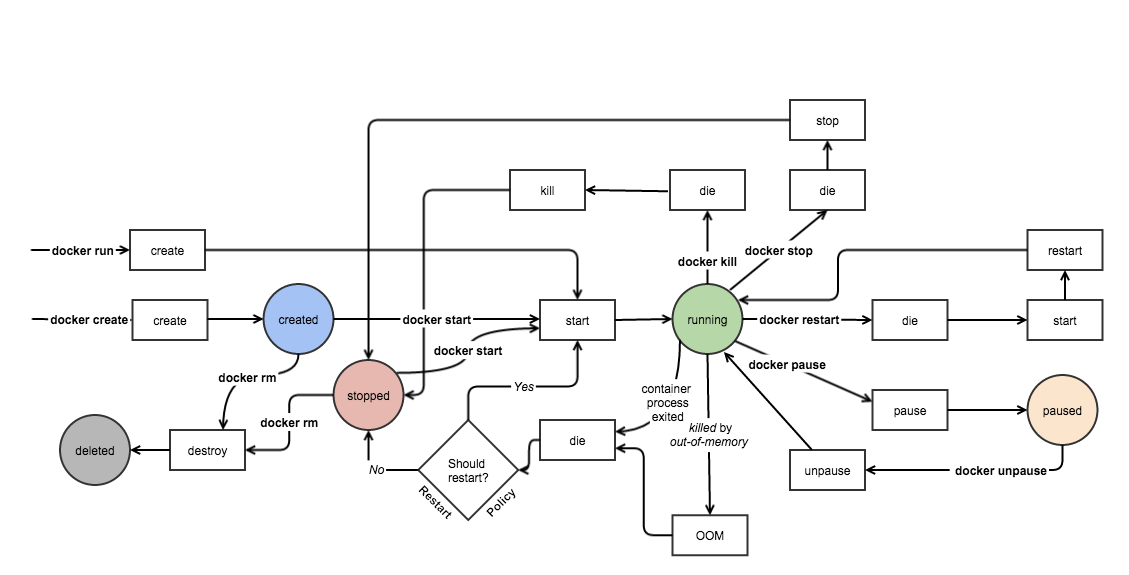
The picture describes the life cycle (finite state machine) of the container. The circles depict the states, the console commands are highlighted in bold, and the squares show what is actually being executed.
Follow the path of the docker run command. This single command performs two actions in Docker: creating a container and starting it. There are more complex execution scenarios, but in this section, we will consider only the basics.
Let’s run nginx so that it works in the background. To do this, we will add the -d flag after the word run:
$ docker run -d -p 8080:80 nginx
431a3b3fc24bf8440efe2bca5bbb837944d5ae5c3b23b9b33a5575cb3566444e
After executing the command, Docker return control and outputs the container ID. Make sure that nginx is working by opening localhost:8080 in browser. Unlike the previous launch, our nginx works in the background, which means its output (logs) is not visible. You can view it using the docker logs command, which requires the container ID:
$ docker logs 431a3b3fc24bf8440efe2bca5bbb837944d5ae5c3b23b9b33a5575cb3566444e

172.17.0.1 - - [19/Jan/2018:07:38:55 +0000] "GET / HTTP/1.1" 200 612 "-" "Mozilla/5.0 (Macintosh; Intel Mac OS X 10_13_2) AppleWebKit/537.36 (KHTML, like Gecko) Chrome/63.0.3239.132 Safari/537.36" "-"
You can also open a log pager using tail -f. To do this, run docker logs -f 431a3b3fc24bf8440efe2bca5bbb837944d5ae5c3b23b9b33a5575cb3566444e. The log will now be updated every time you refresh the page in the browser. You can exit this mode by pressing Ctrl + C, but the container will not stop.
Now we will output information about the running containers with the docker ps command:
CONTAINER ID        IMAGE                            COMMAND                  CREATED             STATUS              PORTS                                          NAMES
431a3b3fc24b        nginx                            "nginx -g 'daemon of…"   2 minutes ago       Up 2 minutes        80/tcp                                         wizardly_rosalind
Columns description:
- CONTAINER_ID — container identifier. Just like Git, Docker uses an abbreviated hash entry
- IMAGE — the name of the image that is used to create this container. If no tag is specified, then the latest is implied latest is implied
- COMMAND — a command that was executed at the start of the container
- CREATED — container creation time
- STATUS — current state
- PORTS — port forwarding
- NAMES — unique names. In addition to the identifier, Docker allows you to specify a name. It's much easier to handle the container this way. If the name is not provided when creating the container, Docker will generate a random one. Like the one, Nginx has in the output above
(The docker stats command gives information about running containers’ resource consumption).
Let's try to stop the container now. Run the following command:
# Instead of CONTAINER_ID, you can specify a name
$ docker kill 431a3b3fc24b # docker kill wizardly_rosalind
431a3b3fc24b
If you type docker ps, you won’t see this container, it has been stoped.
The docker ps command outputs only running containers. However, there may be some stopped ones as well. Moreover, they can stop both upon successful completion and in case of errors. Try typing docker run ubuntu ls, followed by docker run ubuntu bash -c "unknown". These commands do not initiate a long-running process. Instead, the first one terminates immediately after execution, and the second with an error, because such a command does not exist.
The docker ps -a command will now output all containers. The first three lines of output will be:
CONTAINER ID        IMAGE                            COMMAND                  CREATED                  STATUS                       PORTS                                          NAMES
85fb81250406        ubuntu                           "bash -c unkown"         Less than a second ago   Exited (127) 3 seconds ago                                                  loving_bose
c379040bce42        ubuntu                           "ls"                     Less than a second ago   Exited (0) 9 seconds ago                                                    determined_thatchar
Here are our two most recent launches. If you look at the STATUS column, you can see that both containers are in the Exited state. That is, the running command inside them was executed, and they stopped. The only difference is that one completed successfully (0), and the other did not (127). Even after it has been stopped, the container can be restarted:
docker start determined_thatchar # In your case, there will be another name
Only this time you won't see the output. Use the docker logs determined_thatchar command to see it.
Interaction between the components of a system
Running an isolated container that exists entirely within itself is useless. In general, the container must interact with the outside world, accept incoming requests to a specific port, execute requests to other services, read shared files, and write to them. When you create a container, you can configure all of these features.
Interactive mode
As shown, the simplest way to use Docker is to create a container and execute some commands inside it:
$ docker run ubuntu ls /usr
bin
games
include
lib
local
sbin
share
src
$
Docker returns control after executing the command, and we are no longer inside the container. If we try to run bash in the same way, we will not get what we expected:
$ docker run ubuntu bash
$
The thing is that bash starts an interactive session within the container. To interact with it, keep the STDIN stream open and the TTY running (pseudo-terminal). Therefore, to start interactive sessions, make sure to include the -i and -t options. They are typically added together as -it. So, the correct way to start bash is docker run -it ubuntu bash.
Ports
If you run Nginx usint the docker run nginxcommand, it will be unable to accept any request, even though it listens to port 80 inside the container (let me remind you that each container exists in its own network by default). But if you run it like this: docker run -p 8080:80 nginx, then nginx will start responding on port 8080.
The -p flag specifies how and which ports should be exposed to the outside. The format 8080:80 stands for “expose port 8080 inside the container to port 80 outside the container”. Furthermore, port 8080 s by default listened to on 0.0.0.0, that is, on all available interfaces. As a result, the container launched this way is accessible not only via localhost:8080 but also from outside the machine (if access is not denied somehow else). If you only need to do a loopback, the command is docker run -p 127.0.0.1:8080:80 nginx.
Docker allows you to forward an unlimited number of ports. In the case of Nginx, for example, it is frequently necessary to use both ports 80 and 443 for HTTPS. You can do it this way: docker run -p 80:80 -p 443:443 nginx. You can read about the other ways to forward ports in the official documentation.
Volumes
Accessing the main file system is another common task. When launching nginx container, for example, you may provide the configuration that is stored on the main fs (file system). Docker will forward it in the internal fs for Nginx to read and use.
The -voption is used for forwarding. Here's how to start a bash session from an Ubuntu image by connecting the command history from the main file system: docker run -it -v ~/.bash_history:/root/.bash_history ubuntu bash. The history will be displayed if you press the up arrow in the open bash-shell. You can forward both files and directories. Any changes made inside the volume have an effect both inside and outside the container, and all operations are available by default. The number of files and directories that can be forwarded is unlimited, just like the number of ports.
There are some key rules to remember when working with Volumes:
- The path to the file in the external system must be absolute
- If the inner path (what follows
:) does not exist, Docker will create all the necessary directories and files. If it does, Docker will replace the old one with the one that was forwarded
Docker provides various other options for building and using Volumes, in addition to forwarding a part of the fs outside. Read the official documentation for further details.
Environment variables
The application in a container is often configured via environment variables following 12factors. There are two ways of installing them:
- The
-eflag is used as follows:docker run -it -e "HOME=/tmp" ubuntu bash - The
--env-fileoption inserts a special file containing environment variable definitions into the
Preparing your own docker image
Creating and publishing your own image is as simple as using it. The whole process is divided into three steps:
- Create
Dockerfilein the project's root. The process of creating an image should be described inside - Build the image using the
docker buildcommand - Publish the image to Registry with the
docker pushcommand
Let’s consider the image creation process by the example of packaging the eslint linter (do not forget to repeat it by yourself). As a result, we will have an image that can be used as follows:
$ docker run -it -v /path/to/js/files:/app my_account_name/eslint

/app/index.js
  3:6  error  Parsing error: Unexpected token

  1 | import path from 'path';
  2 |
> 3 | path(;)
    |      ^
  4 |

✖ 1 problem (1 error, 0 warnings)
So, simply run the container from this image by attaching the directory with the js files to the internal directory /app as Volume.
1. The following is the final directory structure with the files from which the image will be constructed:
eslint-docker/
    Dockerfile
    eslintrc.yml
The eslintrc.yml file contains the linter configuration. It is read automatically if it’s in the home directory and named .eslintrc.yml. That is, this file should be placed in the image's /root directory under this name.
2. Dockerfile
# Dockerfile
FROM node:9.3

WORKDIR /usr/src

RUN npm install -g eslint babel-eslint
RUN npm install -g eslint-config-airbnb-base eslint-plugin-import

COPY eslintrc.yml /root/.eslintrc.yml

CMD ["eslint", "/app"]
Dockerfile has quite a simple format. An instruction (directive) and its description are stated on each line.
FROM
The Dockerfile FROM instruction is required to set the base image to inherit from. It is important to note here that the images are based on each other and together form a big tree.
The busybox image can be found at the root of this tree. Because Docker provides ready-to-use images for each ecosystem and stack, it is not directly used in applied tasks.
RUN
The main Dockerfile instruction. In fact, we will state the sh command that will be run within the environment here. When creating an image, it is typically specified in the FROM instruction. Since by default everything is executed from the root user, there is no need to sudo (and most likely it is not in the base image). Also, keep in mind that building an image is not an interactive process. When using a command that potentially requires something from the user, it is necessary to hide its output. In the case of package managers, for example, they do the following: apt-get install -y curl. The -y flag indicates that installation should proceed without additional questions.
A Docker image is technically a set of so-called layers rather than a single file. Each RUN call creates a new layer, which can be viewed as a collection of files generated and updated (including deletion) by the RUN command. By caching unchanged layers, you can significantly improve system performance. On the other hand, Docker reuses layers in different images if they are identical, reducing both download speed and disk space occupied. The subject of layers cache is quite important when extensively using Docker. To get the most of it, you must first grasp how it works and how to precisely define the RUN instructions.
COPY
The COPY instruction, as the name implies, copies a file or directory from the main fs to the image. But the transferred files should be in the same directory as the Dockerfile. We generally use this instruction to pack an application in an image.
WORKDIR
Sets the working directory. All subsequent instructions will be assumed to be executed from it. By default, the WORKDIR instruction acts like a cd command. Besides, when we launch the container, it also starts from the working directory. For example, by running bash, you will end up inside it.
CMD
The same instruction that defines the docker run default action. It is only used if the container was launched without a command; otherwise, it is ignored.
3. Building
To create a docker image, use the docker build command. Use -t flag to provide the image name, including the account name and tag. As usual, if you do not specify the tag, then the latest will be set.
$ docker build -t my_account_name/eslint .
After running this command, the current image will be listed in the docker images. You can even start using it, there is no need to publish it to Registry. Let me remind you that the docker run command does not search for an updated version of the image if an image with the same name and tag already exist locally.
4. Publishing
$ docker push my_account_name/eslint
To complete the publishing, you must meet two conditions:
- Register on Docker Cloud and create a repository for the image there
- Log in to the CLI interface using the
docker logincommand.
Docker Compose
Docker Compose is a tool that allows you to develop a project locally using Docker. It is similar to Vagrant in its purpose.
Docker Compose also helps to manage a set of containers, each of which is a separate project service. Management includes building, dependency-aware launch, and configuration. Docker Compose configuration is specified in the docker-compose.yml file at the project roo. It looks as follows:
# https://github.com/hexlet-basics/hexlet_basics

version: '3.3'

services:
  db:
    image: postgres
  app:
    build:
      context: services/app
      dockerfile: Dockerfile
    command: mix phx.server
    ports:
      - "${PORT}:${PORT}"
    env_file: '.env'
    volumes:
      - "./services/app:/app:cached"
      - "~/.bash_history:/root/.bash_history:cached"
      - ".bashrc:/root/.bashrc:cached"
      - "/var/tmp:/var/tmp:cached"
      - "/tmp:/tmp:cached"
    depends_on:
      - db
In action
Setting up project machines with Docker usually comes down to installing Docker. Then you just have to deploy. The basic process is:
- Download a new image
- Stop the old container
- Build a new one
This process does not depend on the technology stack. You can deploy (as well as configure machines) using Ansible.
Another option, suitable for more complex projects, is to use special orchestration tools such as Kubernetes. It generally requires extensive preparation, including an understanding of how distributed systems operate.
Docker: what’s under the hood?
Docker's isolation is provided by the Cgroups and Namespaces kernel features. They enable you to run an operating system process not just in an isolated environment, but also with limited use of hardware resources (RAM or CPU).